by NRF User | Sep 10, 2020 | NRF News
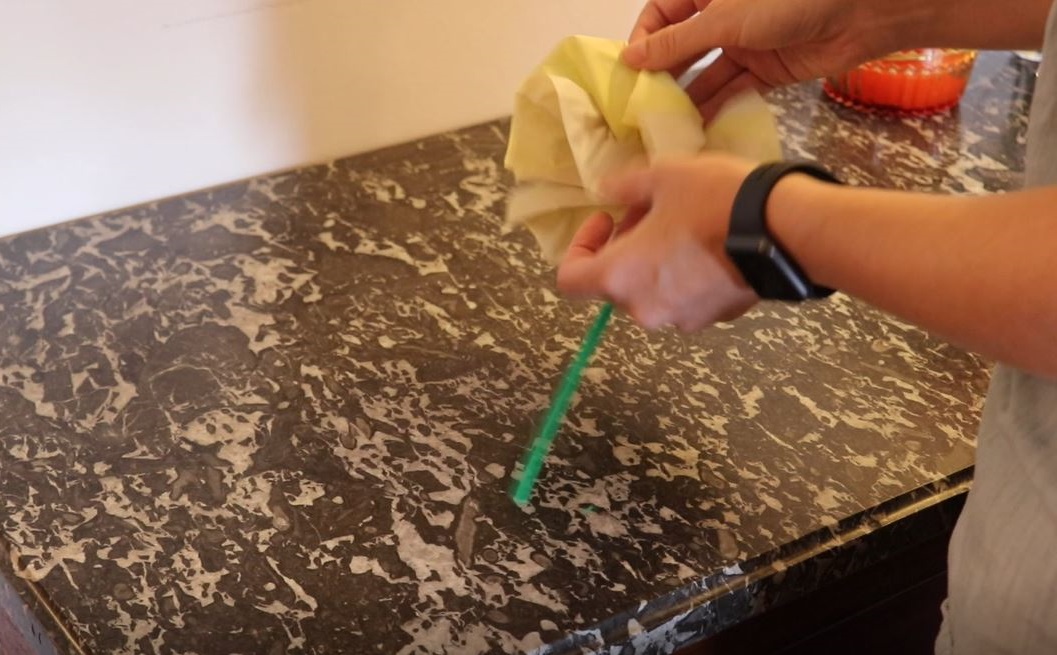
Click here to watch September’s Second Sunday From Home program where we join Aquidneck Community Table to learn more about growing a community garden. See below for instructions on how to make your own flowers that you can keep forever!
Materials:
- Tissue paper
- Scissors
- Pipe cleaner
- Depending what size flowers you would like, cut the tissue paper into equal pieces. Generally, 12×6” size paper works well for medium-sized flowers.
- Take three pieces of tissue paper (can be all the same color, different colors, whatever suits you!) and place them on top of each other in the same direction. Fold the tissue paper like an accordion—first, make a 1” fold along the short edge, then flip it over and make a 1” fold going in the reverse direction, until the whole sheet has been folded like an accordion.
- Place your pipe cleaner in the center of the tissue paper (centered on the long edge), and loop it around the tissue paper, twisting to ensure it stays in place. This is your stem!
- Gently open up the tissue paper folds you made, and separate the tissue paper sheets to make your flower bloom. This can be tricky, so it’s important to be very gentle when pulling apart the sheets.
Share your flowers with us on social media by tagging us @nptrestoration.
by NRF User | Aug 18, 2020 | NRF News
The cicadas call from the trees, the gardens have slowed down their growth, and the air has become thick and still: we have entered into the dog days of summer. I recall gazing at the winter landscapes with anticipation for the spring, dreaming of colors and flowers as if winter would never end. Now I am standing in the shade of a tree as the summer sun wraps itself around everything in a fiery attempt to forget its daily diminishing, as if to say, “I am not ready for fall.”
This past season has flown by, and although there are still a couple more months left to the growing year I can’t help but to begin to reflect on this past season. The most wonderful part of being an estate gardener is being able to witness the ever changing landscape while being a part of the process for that change to occur. At the beginning of my season, I cleaned the gardens, preparing them for a new year by cutting last year’s plants to the ground to make room for this year’s growth, and adding compost to garden beds. I started vegetable seedlings and dahlia tubers inside for spring planting and began to plan for the upcoming season. Slowly as the winter turned to spring, I watched as buds emerged on trees, and perennials pushed their way up through the cold soil. The vegetable seedlings I started finally became large enough to move into bigger pots, and dahlias began to send out their first growth from their tubers. The first signs of the returning of spring evoke such joy, and although the winter holds its own beauty, spring whispers for the world to wake up.
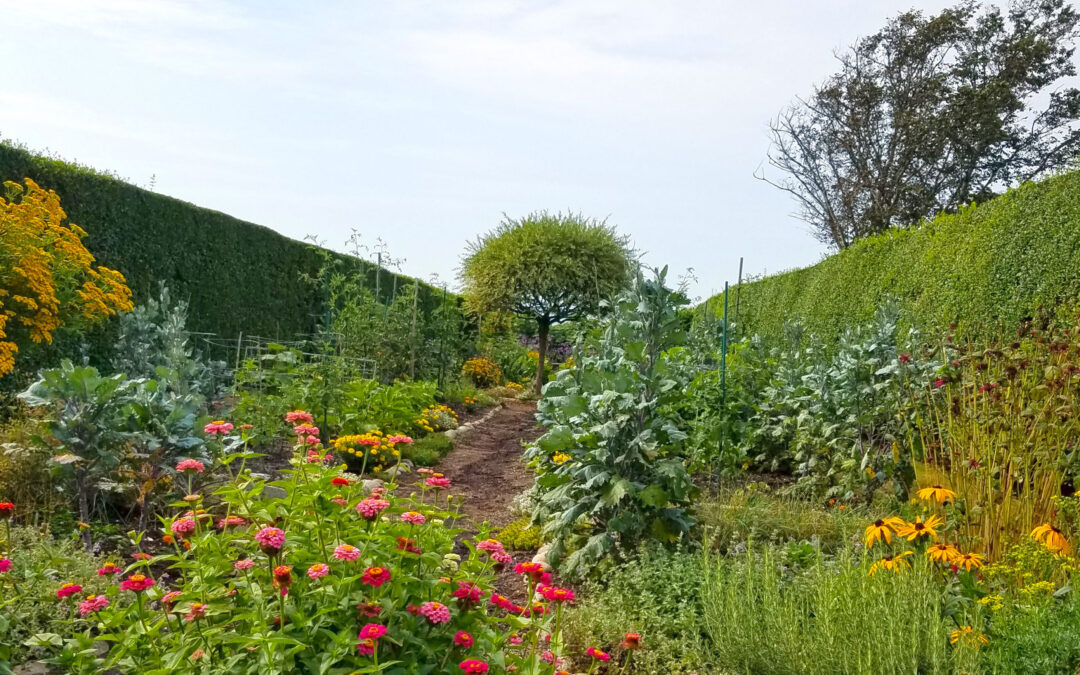
Finally, once forecasts for over-night frosts disappeared from the monthly weather report, it became time to plant the gardens. Planting is very much like painting- each plant being its own color of paint, and the gardener arranging the plants as if choosing from paints on a palette. Planting a garden takes quite a bit of foresight. Knowing how plants perform next to each other (companion planting), what colors the plant’s foliage, flowers, and fall appearance may be, the height and width of the plants at full growth… all of these factors come into play while planning a garden. This year we took these factors into account while redesigning and replanting the East Garden, the Dahlia Beds, and the Kitchen Garden. Plants were chosen and placed where they would hold value next to another plant, whether that be through color contrast, size differences, or beneficial plant growth/health aspects.
The kitchen garden is a wonderful example of how gardens can evolve throughout the season. From the beginning of the year to the end of the season it goes through many appearance changes that take into account the factors that were mentioned above. In the late spring the garden is lush with low growing, cold weather plants: cabbage, lettuce, radish, kale, onion, and chard. Planted amidst these food crops are flowers such as marigolds, alyssum, and perennial flowers just beginning to push their foliage up from underground. As the weather begins to warm up the cabbages, lettuce and radishes are harvested from the gardens and replaced with beans, squash, cucumbers, tomatoes, peppers, eggplant, and basil. These summer vegetables are planted thoughtfully, the cucumbers and pole beans are grown on trellises to save space, the tomatoes are caged and staked upwards to give height to the garden and then under planted with zinnias, verbena bonariensis, basil, and bush beans to fill in the middle ground, and the zucchini and summer squash crawl across the ground.
As the summer wears on and the gardens slow down, I will begin to pull out zucchini and cucumber vines, slowly the tomatoes will stop producing fruit, the beans will stop producing beans. But as these summer vegetables come to the end of their season I am planting seeds for the fall: beets, turnips, lettuces, parsley. Even after the height of the season passes there is still another transition in the garden to look forward to before the gardens lay barren again in the winter.
As the summer flowers in the perennial gardens begin to fade the dahlias are growing and putting on buds for a beautiful fall display. Some flowers that bloomed in the middle of the summer are waiting to bloom once more once the weather gets cooler. The Caryopteris in the Tropical garden will bloom, sending out beautiful blue flowers, and ornamental grasses will show off with their seed heads nodding in the cool fall breeze.
The dog days of summer are often thought about in an almost wistful way. It is a time of change and nostalgia. It is a time where we are all remembering the feeling of sadness we had as children realizing it was nearing time to go back to school, realizing that the careless fun of summer is coming to an end. But the dog days of summer are not an end. The dog days of summer are a reminder that at the plateau of summer when things seem to sleep an exhausted sleep in the hot sun, that it is only a time for stillness in order to recharge and jump into fall with renewed energy. We will see this all around us in the fall leaves and the regrowth and changes in the plants in our landscapes.
Once again, the winter will come and the land will hibernate until spring. Until then, let’s take advantage of the beauty that surrounds us, in public gardens such as ours at Rough Point, in our own yards, and even in the trees and plants that line the sides of the streets in our travels.
By Tessa Young, Estate Gardener at Newport Restoration Foundation
by NRF User | Jul 27, 2020 | NRF News
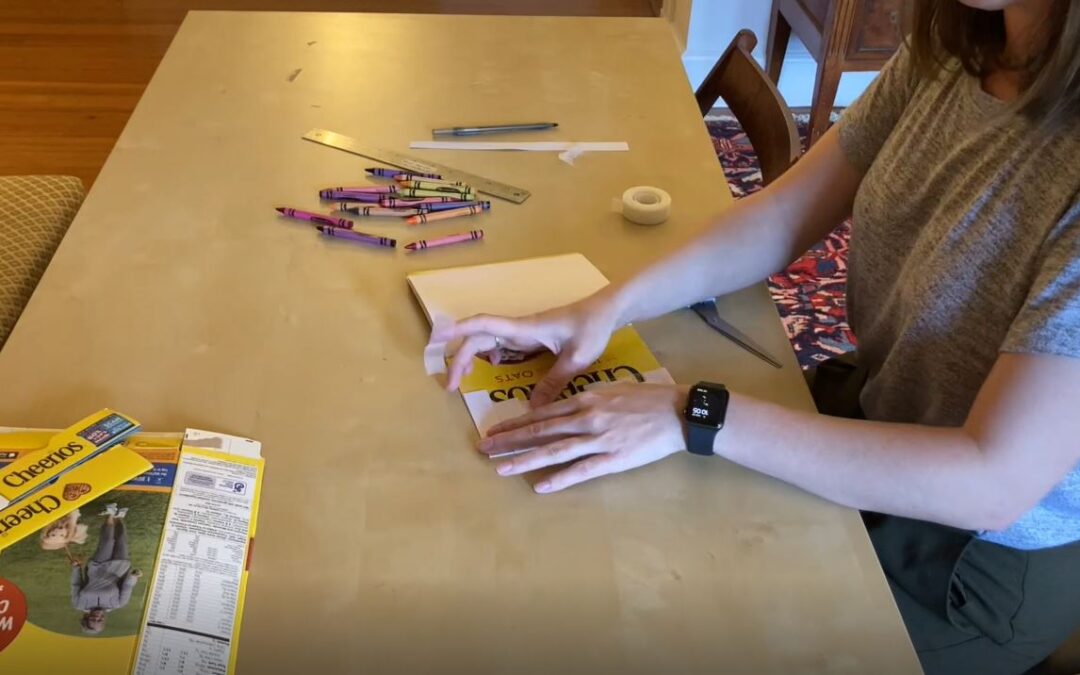
Click here to watch August’s Second Sunday From Home program where we join Clean Ocean Access to learn more about recycling here in Newport. See below for instructions on how to make a book out of recycled materials to celebrate National Book Lovers’ Day on August 9!
Supplies:
- Thin cardboard (such as a cereal box)
- Blank paper, or scrap paper
- Rubber bands
- Ruler
- Scissors
- Crayons (to decorate)
Directions
- Cut cardboard to the desired size of the book (remember that it should be the width of both the front and the back!).
- Fold the cover in half.
- Using the ruler, measure your blank paper to the size of the cover you have just cut out, making sure that it is either the same size or smaller.
- Fold the paper in half. About 5-8 sheets at a time generally works best for folding.
- Align the paper with the cover and slip a rubber band around the center, running along the center crease, to attach the paper to the cover.
- Repeat steps 3-5 to create more pages in your book if you would like. Each additional “packet” of paper should go behind the one before it, and affixed with its own rubber band running along the center crease.
- Once you have attached all your paper, you can use your scraps or other craft supplies found around your house to decorate your cover!
- Then, grab a pencil and start writing!
by NRF User | Jul 14, 2020 | NRF News
This year, we are celebrating the 20th anniversary of Rough Point Museum being open to the public, and this is the second year that the Whitehorne House Museum will be open to the public after a long period of rethinking and reinterpretation. This seemed like a good moment to reflect back on the work we’ve done and the work we aspire to do at both museums. The NRF interpretive team is responsible for the “who, what, where, when, and why” of the museum content guests encounter before, during, and after their visits. In other words, we are storytellers. Although we interpret the past, this work is not static, or frozen in time; it is an ongoing process of learning, reviewing, revising, and retelling.
We have been actively researching, learning, and listening (to our colleagues, to members of our community, and to people who have expertise beyond ours) in order to tell more inclusive, relevant, honest, and broader stories related to Rough Point, Doris Duke’s legacy, and colonial Newport.
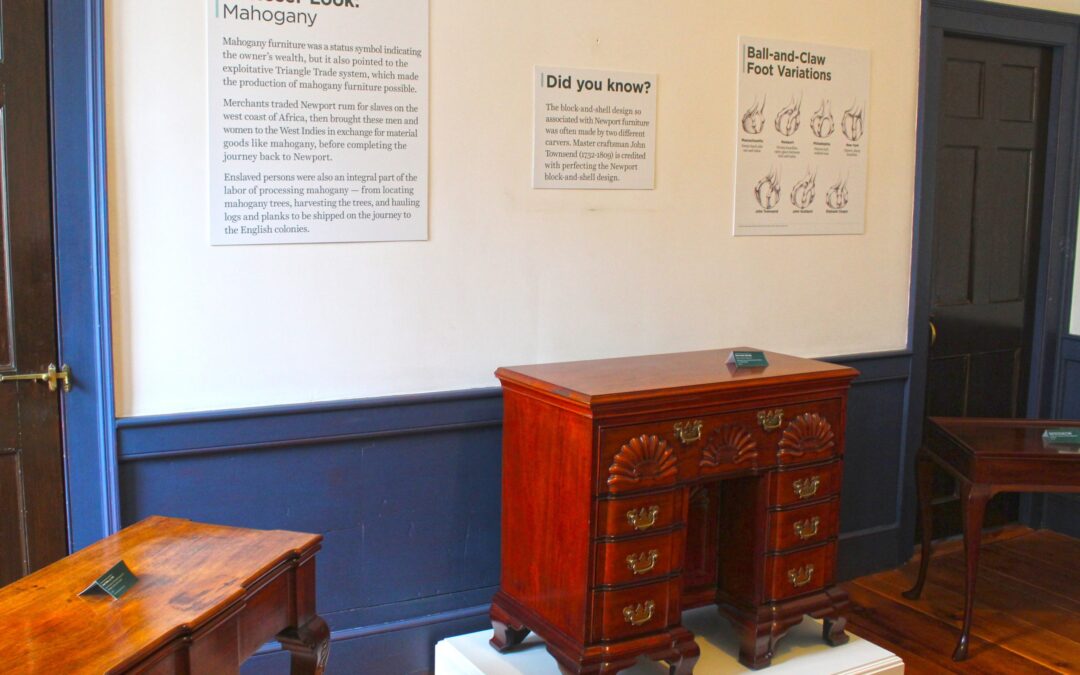
At Whitehorne House Museum, we take a close look at the global systems of the 18th century and the role Newport furniture played in these systems. This is a complicated and sometimes painful history, but it allows us to tell a fuller story. By better understanding our past, we can better understand our present, and what to strive for in the future. Continued research—and the incorporation of different perspectives and voices—is part of the work we do to understand the process of making in cabinetmaking workshops, the division of labor in the production of furniture, the commissioning process, and the display and arrangement of furniture in domestic spaces.
One specific narrative concerns the African heritage men and women in Newport who—despite forced enslavement and systemic injustice—not only survived, but thrived and who made and continue to make significant contributions to the forming of Newport as a successful port city, and later a cultural tourist destination. Enslaved and free people of color were an integral part of many industries in 18th-century Newport, but more research needs to be done to learn about the role enslaved and free people of color had in the furniture industry.
At Rough Point, Doris Duke’s Newport home, we tell the story of her life and legacy. Newport remained a special place for Doris, and one of her most important contributions was the shaping of its historic cityscape through the preservation and restoration of 18th century vernacular (or every day) colonial buildings, as well as her contributions to the cultural heritage sector today through her decision to leave her home and fine and decorative arts collection open and accessible for public enjoyment.
But Rough Point was also the home of other women and men who helped care for and maintain the estate and ensured the estate ran smoothly and efficiently—and their stories are important too. We incorporate the literal voices of former caretakers in our museum tours, exhibitions, and programs. For example, our recent research has enabled us to tell the story of Hulda Goudie (1884-1983), a cook who worked for nearly half a century in the Duke households.
This year’s exhibition, “Beyond Fortune: Myths & Truths of Doris Duke” is an example of listening to our visitors. In our 2019 exhibit we asked visitors what they wanted to know more about in regards to Doris, her family, and Rough Point. Answers are incorporated throughout the exhibition. In addition, we are routinely doing research on objects in the collection of Rough Point and Whitehorne as more scholarship becomes available. This includes doing archival research at Duke University and seeking out similar items in other museum and private collections that can help us learn more about the objects we have. Much of this research has centered on where and how Doris Duke collected and decorated at Rough Point, which has provided many insights into the layered, personal approach to her choices.
Lastly, this year we are also commemorating the 100th anniversary of the 19th amendment to the U.S. constitution, which guaranteed women citizens the right to vote. A selection of objects at Rough Point and Whitehorne House Museum look closely at the stories of women: as craftspeople, artists, laborers, “keepers” and collectors—and how women have shaped our contemporary ideas of culture, history, and heritage.
As we move into the next decade, we will continue to research, explore, and collaborate with others to uncover more stories that are a part of the broader narrative we tell at Rough Point Museum and Whitehorne House Museum. We know that there is more thoughtful work that needs to be done to incorporate the histories and contributions of those whose stories are not as well-known but who should be, including voices of people of color (in particular African heritage, Rhode Island Indigenous, and Latinx voices), domestic workers, women, and LGTBQ+ histories. We will continue to revise and reshape the ways we think about objects, history, memory, and legacy, in order to create more meaningful, relevant, and accessible experiences. We hope you will join us, either onsite at the museums or virtually from your own home, as we continue to explore and share more stories.
By Gina Tangorra, Interpretation & Visitor Experience Manager, and Kristen Costa, Curator
by NRF User | Jun 12, 2020 | NRF News
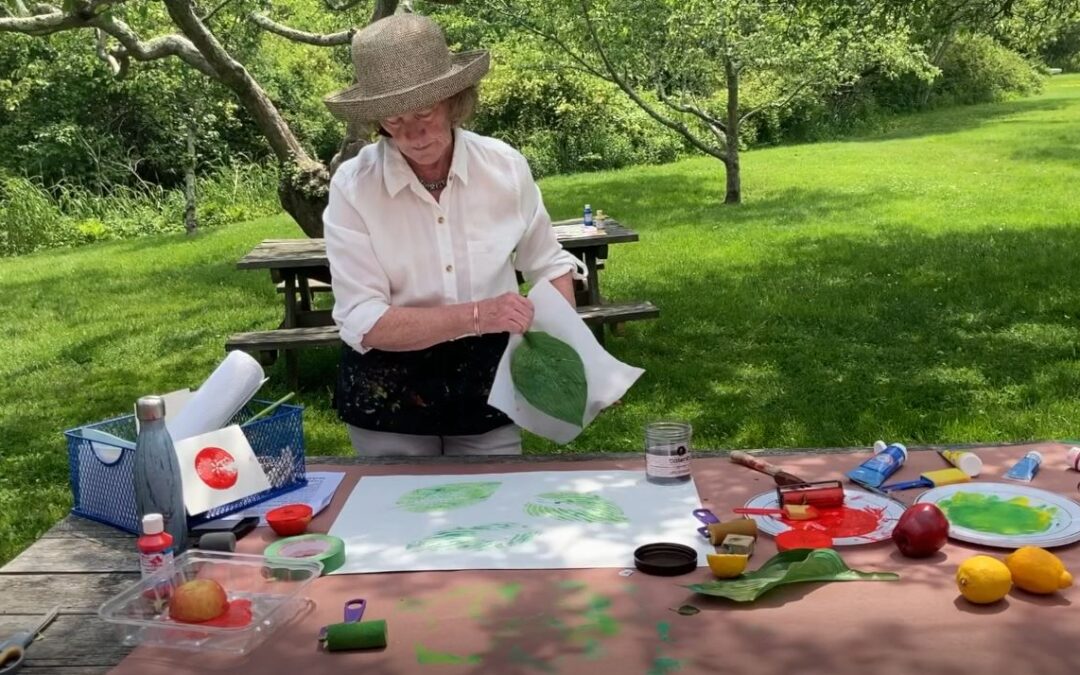
Click here to watch Mandy Howe as she takes us into the apple orchard at Prescott Farm to demonstrate how we can make fun artwork from apples at home!
Here are the instructions for making your own nature art!
Materials:
- Fruits, vegetables, plant leaves (Almost any type of food or plant can be used to make a great print)
- Newspaper
- Paint (tempura, block print, etc.)
- Roller/brayer or paintbrushes
- Plate, tray, or recycled materials to hold pain
- Paper to print on
Instructions:
- Lay out newspaper to protect your work surface
- If printing with food, prepare the food by cutting it horizontally, or cutting the foods into shapes. You can cut apples horizontally to get a star shape in the middle, or citrus to see the design on the inside.
- Pour paint onto tray or plate, and roll out if needed.
- Dip the foods or leaves into the paint, and use roller or paintbrush to completely cover its surface if needed
- Press the food or leaf onto the paper.
- Experiment by using different patterns and colors, as well as different textures and colors of paper to print on.
- You can print on fabric if you use acrylic or fabric paints, to make a T-shirt, pillowcase, hat, apron, etc.
Don’t forget to share your artwork with us by tagging us on social media @nptrestoration!
by NRF User | Jun 12, 2020 | NRF News
Dear Newport Restoration Community:
Summer is finally upon us here in Newport and our team is looking forward to reopening our museums to guests again very soon. Our Preservation Department has also been tackling the preservation and maintenance of our properties while adhering to a new set of COVID-19 protocols to ensure their health and safety as well as that of our tenant-stewards.
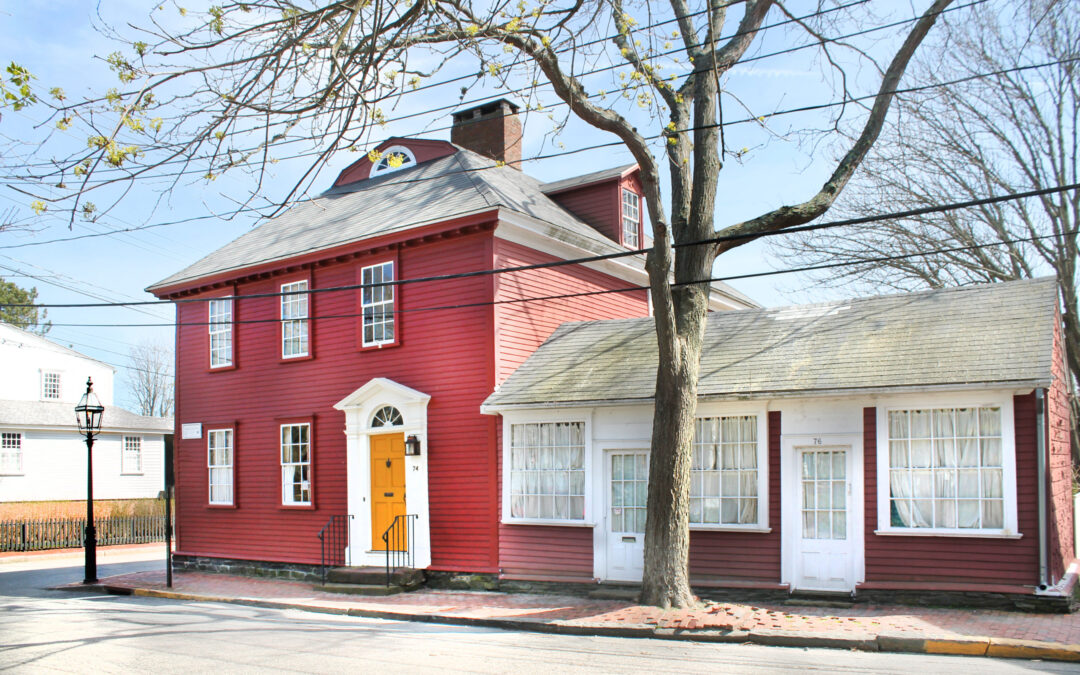
As part of our ongoing efforts to effectively manage our real estate portfolio, we are listing one of our properties, 74 Bridge Street. While it’s unusual for us to sell a property, it is something we do occasionally consider in the context of our overall portfolio, which includes over 70 historic homes. NRF, and other partner organizations, have gained knowledge from the home related to historic renovations, historic structures and sea level rise that will inform our work moving forward. We are requiring that the home be sold with an exterior easement attached to preserve the historic integrity of the property and the neighborhood. We are confident that we will find the right fit in a new owner.
If you have any further questions, please see the question and answer section below.
We look forward to seeing you soon.
Thank you,
Mark Thompson,
Executive Director
Q & A
Why is NRF selling 74 Bridge Street?
After NRF acquired the home, we used it to gain further knowledge on historic renovations, historic structures and sea level rise that will inform our work moving forward. We have made some upgrades to the home, such as a new roof, driveway, heating elements and others. With the additional upgrades needed for the home and current mortgage, the property does not fit into our rental model. We have worked with students to document the history of the property through archival research, architectural photography, and measured drawings, and NRF is requiring that the home be sold with an exterior easement attached to preserve the integrity of the property and the neighborhood. We are confident that we will find the right fit in a new owner.
How do the plans for 74 Bridge Street fit into NRF’s broader goals and real estate portfolio?
NRF is a preservation organization that has preserved over 80 buildings on Aquidneck Island, most of them in Newport and all of them historic. From time to time, we sell properties. Although, our staff and Board have discussed some program-related uses and rental in the past, it makes sense at this time for us to sell 74 Bridge Street. We will continue to protect the historic integrity of the home by requiring an exterior easement on the home which must be honored by future owners.
Is flooding, or climate-related effects, in the area a factor in selling the property?
Our decision to sell the house is unrelated to the flooding in The Point neighborhood. The house has provided valuable insight for studies conducted by us and others regarding historic structures and sea level rise. In addition, R.I. School of Design, with the assistance of NRF and the van Beuren Charitable Foundation, held a one-day exhibition at 74 Bridge Street using AR/VR technology to propose potential solutions for the future of the Point neighborhood in the context of sea level rise. We are proud to have had a property that was able to contribute to the conversation and teach us valuable lessons on this topic.
As the owners, NRF made flood-related updates to the home, such as relocating electrical panels, the boiler, and the hot water heater from the basement to the first floor. We also added sump pumps and a water detection alarm system that activates when water enters the basement.
Has COVID-19 affected NRF’s efforts? Is that why 74 Bridge St. is being sold?
NRF has thoroughly reviewed the decision to sell the Bridge Street property. The sale was approved by the Board in December 2019. While COVID-19 has had an effect on our ability to host in-person meetings and events, it was not a factor in the decision to sell one of our properties.
Is NRF selling any other homes in The Point neighborhood?
NRF currently owns 24 other historic houses in the Point with no current plans to sell any of them. In addition, we continue to stay up to date and involved in the conversation around climate related and flood prevention efforts in the area.
What has NRF done to protect its homes in The Point from climate change and flooding?
The threat of increased flooding is a unique and difficult problem that, especially in the case of historic structures, requires a sophisticated solution. We have been learning more about the steps other cities and organizations are taking to counteract the threat and working with consultants to learn more about the specific nature of the problem in Newport. We are also working with other entities, such as the City of Newport where appropriate, to develop solutions. These efforts recently include providing comments on various drafts of the guidelines for elevating houses recently passed by the City Council. It is important that the steps we take make sense in the context of the overall response.
How will this impact NRF’s climate change initiative?
This sale will have no impact on NRF’s commitment to its climate change initiative. We learned quite a bit during the five years we owned the house, which is informing our climate change activities.
Our study on 74 Bridge Street published for the public continues to be utilized here in Newport and around the country. We have sponsored and participated in five Keeping History Above Water conferences or workshops: Newport (2016); Annapolis (2017); Palo Alto (2018); St. Augustine (2019); and Nantucket (2019). The next Keeping History Above Water conference will take place in Charleston in March 2021. NRF is also currently working to bring the contemporary art project, “In the Waves” by Melissa McGill, to Rough Point in 2021 in an effort to raise awareness about sea level rise.
Where can I find the listing?
Click to here for the property listing.